| SETTING THE MIND IN PERFECT MODE - by Pieter W. Nel
This article is not about how to build an aircraft, because many articles on the subject are available on the internet. As I have build three home builds myself and know how many times I wanted to throw in the towel with my first wood and glass fiber project (KR 2), it is not strange then that many homebuilders through the years have thrown in the towel, mainly because their minds were not set in the perfect mode. These abandoned projects normally end up somewhere in a garage or shed, or are sold to other potential homebuilders.
The focus here then will be to give newbie's some guidelines to set their minds in the perfect mode by using a perfect example, before they decide to build an airplane, and also to point out the danger of changing original specs on home build designs.
Let me ellaborate a little on the matter of changing original specs, by one example of dozens of accidents which were added to the list of statistics. Way back when I was a young man, I tried my hand in building a sleek little KR 2. At the time we had an approved person and test pilot for KR 2's by the name of Sakkie Hallgreen. One of our guys had also build a KR 2 and modified it by building extra petrol tanks into the wings. The modification somehow changed the centre of mass [centre of gravity] and to get it right the builder had fixed lead into the spinner!!!
Sakkie has put the KR 2 succesfully through it's first paces, then both of them went op succesfully with the tanks half with fuell. The third flight with full tanks ended tragically when the lead inside the spinner came lose and went through the prop. The KR 2 went straight for mother earth killing both it's occupants. Now then, where does one really start once the plans are obtained? Most important is to study all the sections and parts of an aircraft and get familiar with them, their functions and inter-actions. A newbie must know his abilities and ask himself some of the following questions: will he have the needed ability and skills to build an aircraft? Does he understand the law of gravity and all the different influences working in on an aircraft in flight, or in a spin, or a spiral dive which can become deadly killers if for instance, the original designer specs are modified without thorough and careful investigation and study?
Does he know that building material must comply with the prescribed specifications of each and every aircraft, not only to withstand G-forces in certain maneuvers, but also to be strong and durable to ensure many hours of joyful and save flying? Will he be aware of the fact that unspecified inferior material can cause structural failure and consequent death?
The finished product must be able to pass regular inspections by a certified inspector and the strict requirements of the Department of Civil Aviation for the issuing of a certificate of airworthiness?
Talking about skills - a lot of different skills are needed for each and every little job, on each and every different design, like wood and fabric, or wood and glass fiber, or all metal, etc. When looking at the different sections of an aircraft, like the engine compartment, the cockpit, the fuselage, the tail section and the wheels, it becomes evident that skills alone are not enough! A huge amount of knowledge on the subject, including product knowledge and how to use it is absolutely essential.
Let us look synoptically into some important aspects of these sections:
Engine Compartment
There are much more to it than just fitting an engine into the compartment because this is where thrust is generated to propel the aircraft to get airborne. For instance, different horse power will be required for one, two or four seaters, etc. The airflow over the cylinders must be correct and adequate. For best performance and speed required when using a fixed pitch propeller, it is necessary to work out the best power/weight ratio in accordance with the pitch of the blades and the rpm of the engine.
The Cockpit
The cockpit from where the aircraft is actually flown certainly is the most important section because all the controls lead to, or from the cockpit and all the meters and switches are fitted here. Special attention and care should be taken when choosing this equipment because the builder's life may depend on it. It is also important to fit all the equipment in the cockpit in the right positions to ensure save handling and reading.
The Fuselage
One of the most important issues on an aircraft is the centre of mass which lies somewhere between the engine compartment, the design, length and weight of the aircraft. If the centre of mass is not right, the aircraft becomes unstable and dangerous.
The Wings
The wings of course, together with thrust are what get an aircraft in the air. It is imperative for the builder to know the difference between high speed and low speed wings. Flaps and ailerons will depend on wing design and speed required. It is also important to know that a high performance aircraft for instance, will require a wing loading of between 6 and 8 oz/sq ft.
The Tail Section
The newbie must know that the design of the tail section is equally important for different reasons, and that the surface area of the vertical stabilizer with rudder and trim tab must be adequate to handle the size of the aircraft in any maneuvers. The elevator on the horizontal stabilizer in conjunction with the rudder and stick are important, not only for climb and descent, but also for balanced turns and in performing aerobatics.
The Wheels
When designing [or building] an aircraft it is imperative to decide whether it is going to be a tail wheel, nose wheel or even retractable gear, because in each case the centre of mass will determine the position of the wheels in relation to the cabin.
By Example
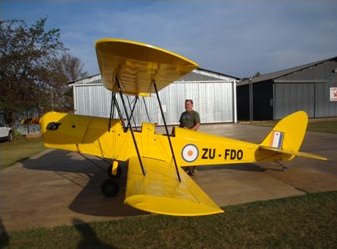
Let us now look by example how a Ragwing Tiger Moth 80% was build from scratch as a first project, with only the plans and without a building guide (plans included some building videos). It certainly takes a lot of determination and persistence. Having said that, it really sounds nonchalant, but I can assure you these words are a far cry from reality. It needs a lot more than determination and persistence including sweat, and sometimes tears of frustration. I am talking here mainly about homebuilders in small towns and remote areas far from big cities. Following the road from Groblersdal to Marble Hall for six kilometers, turning off to the left continuing on the dirt road for another two kilometers into a bushveld farm, lives a perfect example of a man who has build a Ragwing Tiger Moth 80% (scale replica of the DH.82a Tiger Moth) from only plans, which is a first of this type in South Africa.
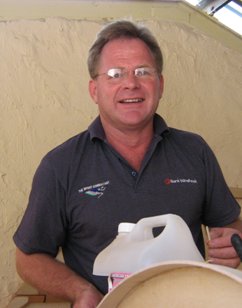
Uys Meiring,
perfectionist, agricultural scientist, n'guni farmer, family man and microlight pilot. The reason why I am using Uys as an example is because he is one of those rare examples par excellence.
 |
 |
| A relaxed Uys Meiring putting his skills in action. |
Construction of tables, jigs, etc. |
Uys started building his Ragwing Tiger Moth 80% in June 2006, after burning a lot of midnight oil studying the plans and videos. Another three months followed constructing tables, jigs and making special tools for the project. During these agonizing stages of preparation and uncertainty, Uys Meiring has set his mind in the perfect mode, like a maestro's ears to his orchestra, and eventually created the finest work of art in the Tiger Moth.
 |
|
Like any serious homebuilder, Uys has also invested heavily in learning new skills that enabled him as a perfectionist to produce airworthy parts at a craftsmanship level that will make any homebuilder proud. Uys' skills investment seems to have been an excellent return on his investment because he has already started building a Piper Vagabond 80% and has already received plans for building a Bristol M1 80% as a third project. Wow... hope Uys decides to build the Bristol as his second project...
Uys started with the wing ribs and wing spars and in the first 100 hours completed the tail feathers, half the fuselage, the wing ribs and spars. Look at the absolute neatness of his workshop at home.
After about 320 hours the Tiger Moth began to grow in size and shape, looking more like an airplane, so Uys had to move his new found love to a hangar at the local aerodrome in Groblersdal. By the thirteenth month all the woodwork was completed and again, it sounds so easy but, it was thirteen months of planning, measuring, cutting, sweating, sanding, gluing, sanding, clamping, dry fitting, sanding, sweating, over and over again.
Fortunately Uys has one of those rare but important qualities needed so badly by home builders, and that is patients... Remember that these little airplanes are not built in factories, but in back yards in a garage or outbuilding and that many parts are made by hand without sophisticated machinery!!!
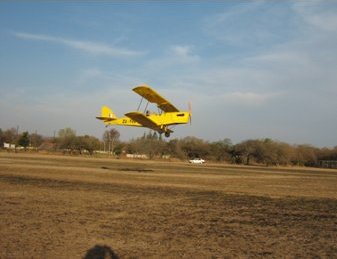
The moment of truth arrived on September 13, 2009 when ZU-FDO left earth for the first time on her first very short maiden test flight where I had the privilege to be with a very nervous and worried Uys. He shared some of the agonizing thoughts sweeping through his mind with me. His main concern was that something could go wrong and put the pilot's life in danger. Of course I tried to calm him down by telling him not to doubt his abilities and the fine work of art he has produced in ZU-FDO. Eventually he seemed to become more relaxed. Jan found only a few small things on the Tiger that had to be fixed before he could approve it for the issuing of a certificate of airworthiness. Congratulations Uys for a job well done, we hope that the Tiger will give you many hours of joyful flying.
|
|
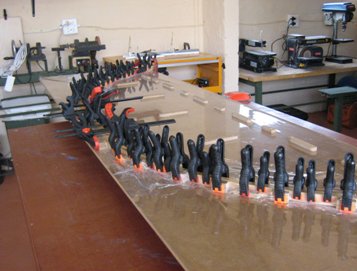
Ways and means to get the job done!
|
|
 |
|
|
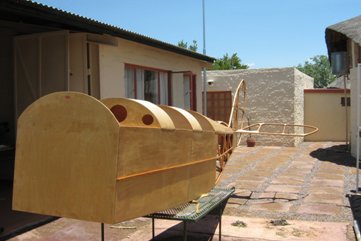
Fuselage getting shape...
|
|
 |
|
|
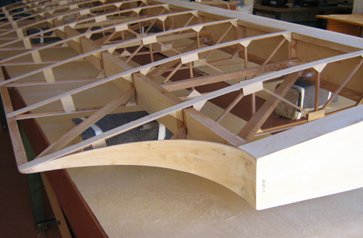
View of a perfect wing rib.
|
|
 |
 |
| Uys with the Tiger just before its first taxi run |
|
Technical Specifications for the Ragwing Tiger Moth
|
Wingspan
|
:
|
24 ft
|
|
Wing area
|
:
|
161 sq ft
|
|
Length
|
:
|
20 ft
|
|
Height
|
:
|
7,5 ft
|
|
Seats
|
:
|
2 tandem
|
|
Empty weight
|
:
|
490 lb
|
|
Gross weight
|
:
|
1 050 lb
|
|
Engine fitted
|
|
|
|
HP/HP range
|
:
|
70/70-80
|
|
Fuel capacity
|
:
|
17 gal
|
|
Landing gear
|
:
|
tail wheel
|
|
Building materials
|
:
|
wood, fabric
|
|
Building time
|
:
|
600 man-hours
|
Flight Performance
|
VNE
|
:
|
110 mph
|
|
Cruise speed
|
:
|
80 mph
|
|
Stall speed
|
:
|
35 mph
|
|
Climb rate
|
:
|
750 fpm
|
|
Range
|
:
|
250 m
|
|
Take-off run
|
:
|
300 ft
|
|
Landing roll
|
:
|
400 ft
|
|
Service ceiling
|
:
|
10 000 ft
|
|


